Late last fall, Tractor.com visited the Woodland Power Products manufacturing/assembly facility in West Haven, Conn., bringing our readers an overview of products, including the Cyclone Rake. While there, we discussed doing a long-term test the following leaf season, to see how the rake worked under the varying wet, dry, dusty, windy etc. fall conditions.
On Sept. 14th, President Matthew Coz personally delivered our Cyclone Rake in eleven boxes, having given Tractor.com the option to test an assembled unit, or unassembled as a prospective owner would receive. We opted for the full owner experience, with this first-of-two part article covering the assembly and installation of the Model XL rake and the forthcoming one detailing how the rake works under those varying conditions.
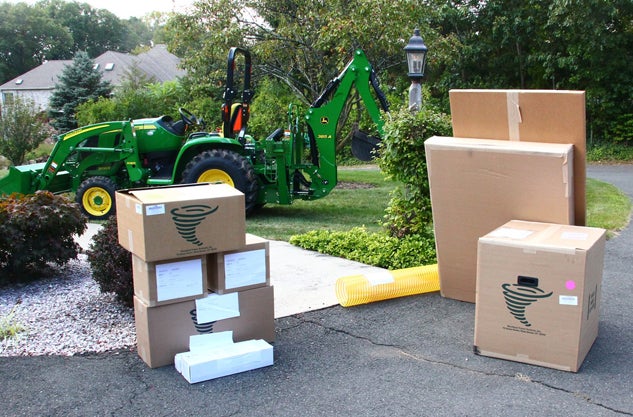
Alerted to begin with the box marked “Open This Box First,” we first did a box count and only came up with ten. Nervously we counted again, this time discovering one box had two labels affixed – the contents of what would have been another box combined to minimize shipment space and cost. Opening the boxes, we found only high-quality packaging, including engineered materials such as Instapak and injection molded clips designed to prevent component damage. Woodland charges $149 to ship the Cyclone Rake to your door, and while that might sound high, one look at the packaging – not to mention the cost of FedEx for ten boxes – and one quickly understands this is not a revenue enhancement area.
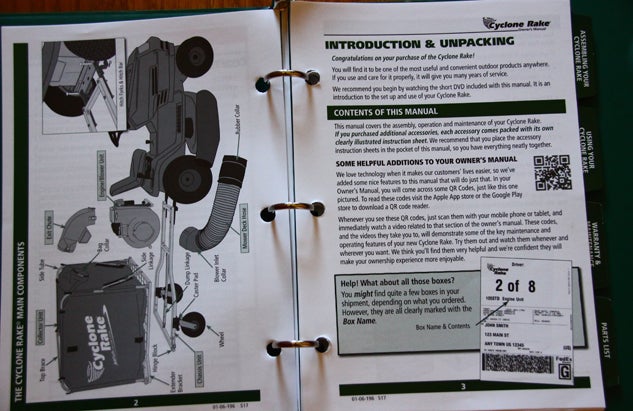
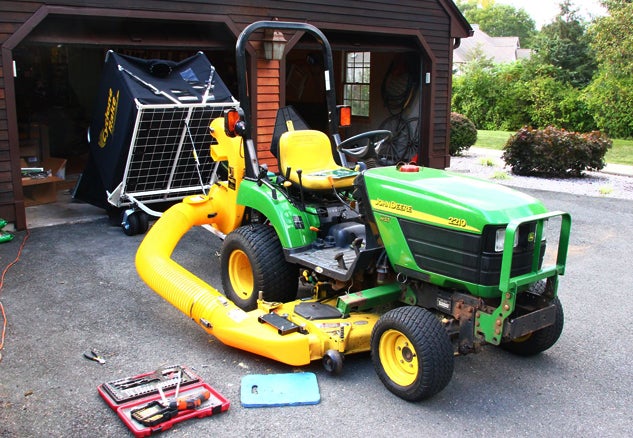
“Open This Box First” contained the owner’s manual, which turned out to be a shrink-wrapped 3-ring binder with tabs separating assembly, use, warranty and maintenance, and parts. We found the instructions clear, concise, and paired with barcode labels to direct smartphone users to videos of the accompanying section. The tractor our Cyclone Rake XL would be mated to was a John Deere 2210 subcompact with a 62” mower deck. Have a smaller or larger deck? No problem, the Cyclone Rake lineup includes models for the smallest of lawn tractors and zero-turns all the way to mowers with decks as large as 72”.
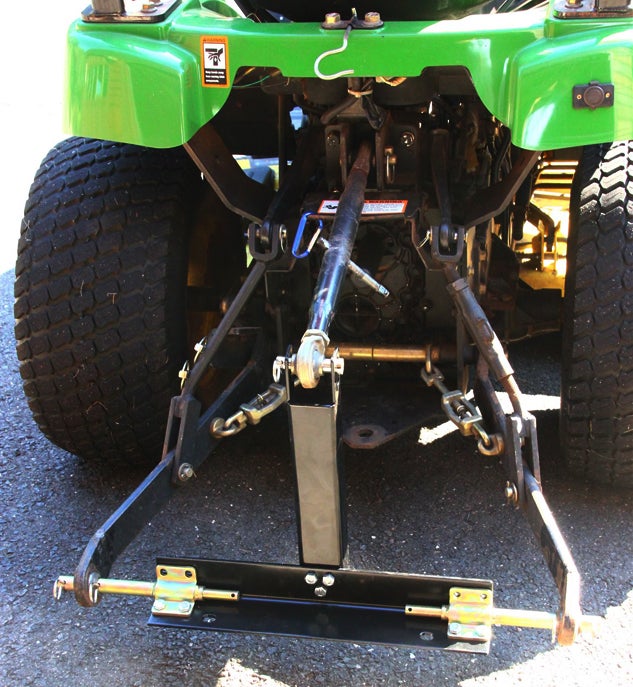
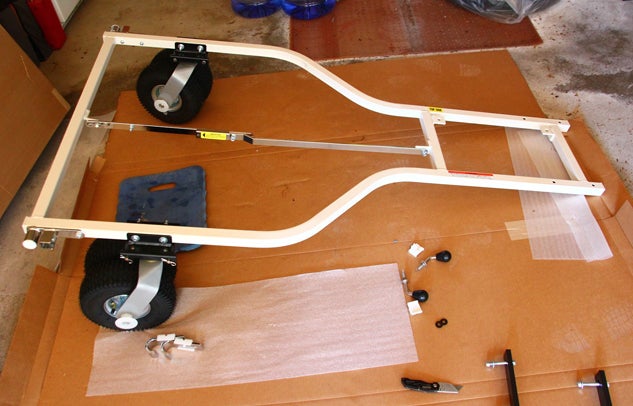
The first assembly the owner’s manual directed us to do was the three-point hitch (3PH) bracket. A completed Cyclone Rake (all models) attaches to the tractor in two points either through a model-specific mounting plate or, as in our case, the 3PH bracket. The concept is that the collector unit remains directly behind the tractor and cannot jackknife as a traditional pulled trailer can. This makes the rake easier to backup, less likely to block rearward view while reversing, and fixes the hose length running from the tractor deck to the blower for max efficiency. The 3PH assembly kit included Cat-O and Cat-I pins and iMatch bushings for tractors using that hitch system. We noted the gauge steel used was not skimped on, the plating of plated components clearly the best available, and the hardware all high quality and designed for many years – if not a lifetime of service. This would be a theme found throughout the assembly process.
Once the hitch was completed, the next step was to assemble the frame/chassis hardware and attach the wheels. Each section of the owner’s manual includes safety notes, list of tools needed, handy tips, and barcodes for visual video assembly reference if desired. Our XL model came with dual 4.10/3.50-4 2PR pneumatic tires, and aside from the engine assembly, came in the next heaviest boxes. Once the frame/chassis assembly was completed, the unit attaches to the 3PH using a pair of hitch and bridge pins. The collector unit comes mostly assembled, only requiring the owner to install the extender brackets and J-hooks, and then attaches to the frame/chassis without the need for tools. Again, the hardware used is first rate, with thought going to little things such as including a slider bracket to keep the unit locked in a tipped-up position for dumping.
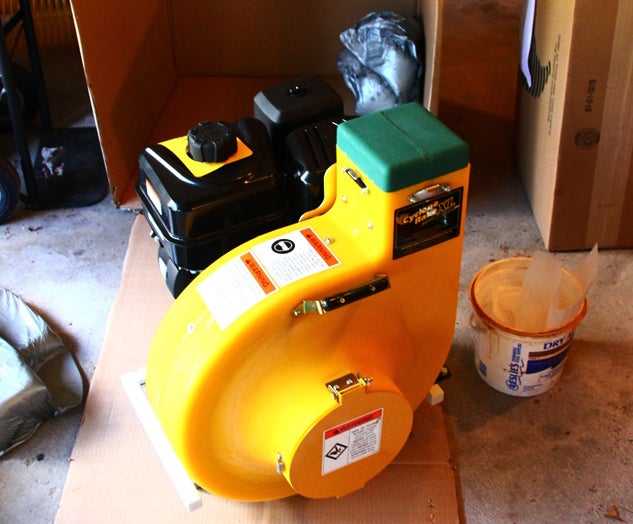
Our XL rake came with a Briggs & Stratton 8 hp Vanguard commercial engine. This is a unit with a runtime life expectancy of 2000 hours. It comes ready to mount and run with the exception of needing to be filled with oil (included) and gasoline (not included). Though our test unit came with a manual start engine, an electric start package is available. The next assembly was the mower deck hose (8” diameter in our case) and blower exit chute. The former attaching by threading into the inlet collar and the later into a similar collar using a band clamp. The last assembly was the installation of the mower deck adapter, and one that we probably spent more time on than any other segment of the assembly.
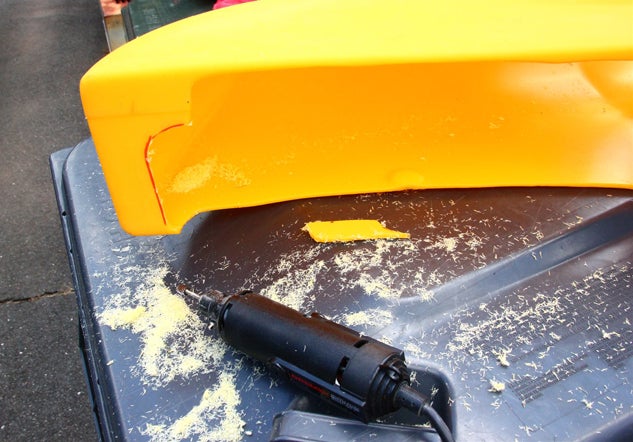
The mower deck adapter, as are many of the blower components, is a heavy gauge molded piece. Though it is sized for a specific deck size, it is generic in fit. And though a perfect fit is not required (the blower develops tremendous vacuum force), we wanted a better fit than generic. For that, we snuggled the adapter up to the deck, and using a Sharpie, made some marks where material needed to be removed. For this, we used a Dremel tool with a rotary cutting bit. After a few tweaks and a lot of plastic chips and dust, we had a near perfect fit. The only steps left were to shorten the mower deck hose to the needed length using a utility knife and wire cutter, fill the tank with fresh gasoline, and then try out the Cyclone Rake.
Being mid September, the leaves here in New England had yet to come down. There was plenty of wet dew on the lawn though, and a lawn that needed a haircut. Not optimum conditions to mow, but perfect to see how the Cyclone Rake operated in less-than perfect conditions. Starting the Vanguard engine was a one-pull non-event. And though the engine is not loud by modern standards, hearing protection is recommended. To this extent, earplugs and eye protection are included. For hearing protection, we prefer our 3M Optime 105 over-the-head earmuffs with 29 dBA noise reduction, though the included earplugs certainly offer more than enough protection.
We mowed approximately 100’ before stopping and checking the collector unit, finding a thin layer of finely chopped, but wet grass on the collector floor. A warning label on the roof vent warned to check the vent frequently when using the Cyclone Rake in wet conditions, but we noted little buildup. We then mowed an acre and a half, getting a little carried away with the handling nuances (more on this in our next edition as we get to use the Cyclone Rake on leaves), and watching the grass flow through the hose. And though the grass was wet, the hose never clogged, and was a testament to the airflow created by the blower.
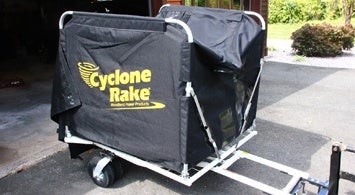
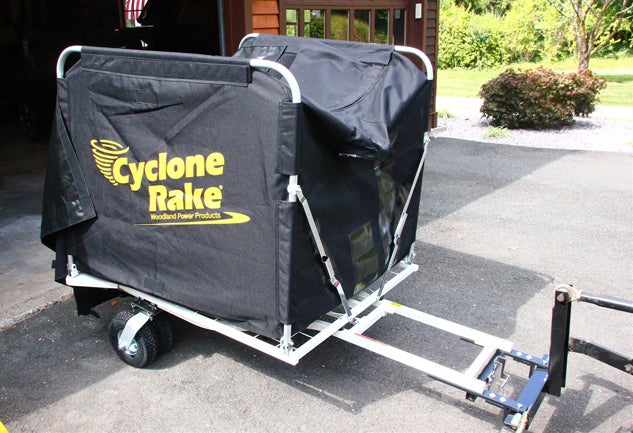
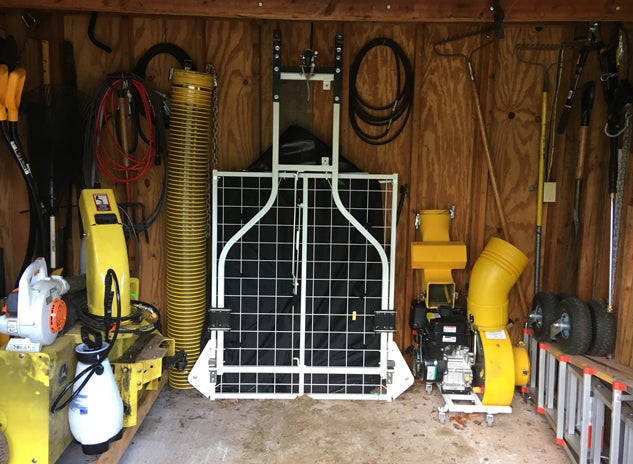
When we went to dump the 415-gallon collector, it was half full of wet, finely chopped grass and heavy. Tipping the heavily-loaded collector took some effort (easily negated by not mowing wet grass or at least dumping it a time or two in-between) but nothing unreasonable. The wet grass slid right out from the collector, leaving surprisingly little cleaning of the inside. The upper vent did have a bit of wet buildup, which was easily cleaned using the included brush. After a little cleanup, we rolled the unit into our shed, using the included 3rd wheel Jack stand, and in just a few minutes had it stored, taking up as little space as billed.
First impressions: the Cyclone Rake is a quality, highly engineered vacuum unit, easy to assemble and install, easy to use, efficient (even under less-than-optimum conditions), and easy to store. In our book, that all adds up to a thumbs up. Stay tuned to when the leaves begin to fall and our next installment covering third season leaf cleanup.
 Your Privacy Choices