.jpg)
With much of North America in the throes of one of the coldest winters on record, springtime tractor maintenance might not be on the top of to-do lists – but it should.
Studies by leading universities with agricultural extensions have shown repair reductions by as much as 25% can be realized by regular servicing and scheduled preventative maintenance vs. average and, unfortunately all too common, “we’ll get to that soon” maintenance. Put off that maintenance item, and spring will soon be here, bringing with it the temptation to further put off maintenance to get that field ready for planting, or that lawn mowed.
The first step in any successful maintenance program is to commit to the program. Breaking down the servicing to monthly intervals, especially with multiple pieces of equipment, can be helpful. Programming reminders into today’s smart phones make sticking to intervals all the easier. If usage (machine hours) is small, yearly servicing may be sufficient. If so, then fall may be the best time, when temperatures are still temperate and fresh lubricants can help prevent corrosion. The second step is to develop a relationship with your dealer, if you haven’t already. Your dealer will know your tractor(s) inside and out and be aware of issues that have crept up in other similar machines.
Next, become thoroughly familiar with your owner’s manual. If you already haven’t done so, those cold winter nights with little to do are perfect settings to read the manual from cover to cover, highlighting important items to remember and incorporate into your maintenance regimen. And lastly, create your own, or use the maintenance log included in your manual. Keeping track of maintenance intervals and servicing done is paramount to a successful program.
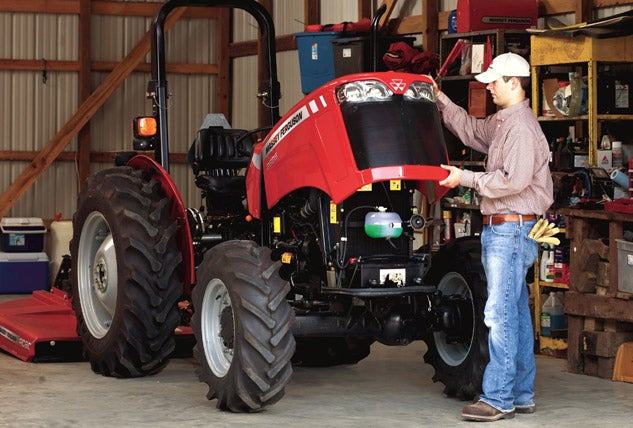
Moving on to your tractor, an inspection looking for loose, damaged, and missing componentry is in order. If your machine was put away dirty from late fall/early winter use, a wash and degreasing step is recommended. Soap and water with a soft cloth/brush will get to most of the grime, but a spray degreaser will be helpful with tougher to get to areas. Check beneath the tractor for leaks. There should be none. If there are, determine where they are coming from and plan to do what’s necessary to fix the problem. While you’re inspecting the tractor, look for missing or damaged safety items and guarding.
Check for loose electrical connections. Operate and cycle lights, flashers, and switches, looking for any sign of malfunction. Check the condition of the battery. We’re big proponents of using battery tenders while the tractor is in storage. Battery tenders cycle the battery, making sure it’s at peak operating power, while extending battery life. Inspect the battery terminals, cleaning them with a baking soda solution to neutralize accumulated salts. Measure voltage. A load tester is also a relatively inexpensive investment and can help point to a battery nearing failure. If unsealed, check fluid levels and top off. Remember to use only distilled water. And lastly, be mindful of finger rings and battery terminals – accidently shorting across one can lead to a nasty and painful burn.
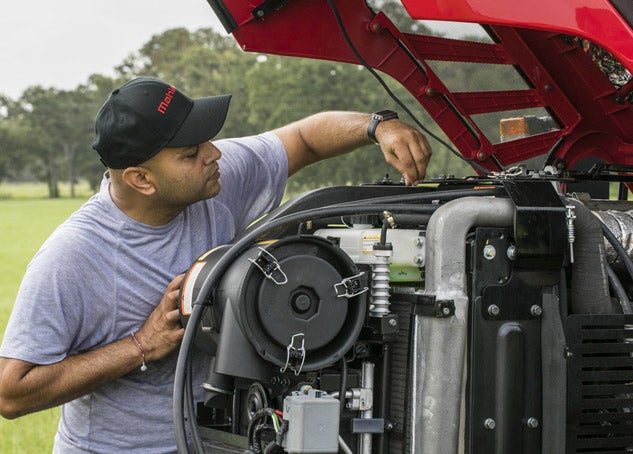
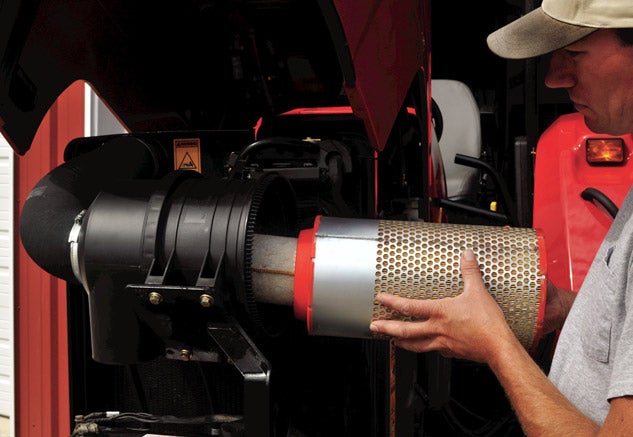
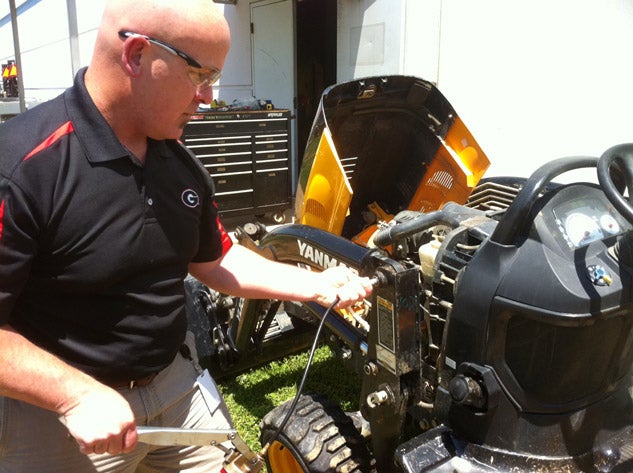
Inspect the engine bay. Look for signs furry critters haven’t made any nests. Air filter cannisters are a prime nesting location, but don’t forget areas such as underneath the dash panel. Inspect the drive belts on the outside and the inside for cracks and abnormal wear. Replace as necessary, remembering to not overtighten, which can lead to bearing failure, or undertighten which can lead to squealing and driven component underperformance. Also, check the radiator screens for debris (and nesting signs). Clean as necessary.
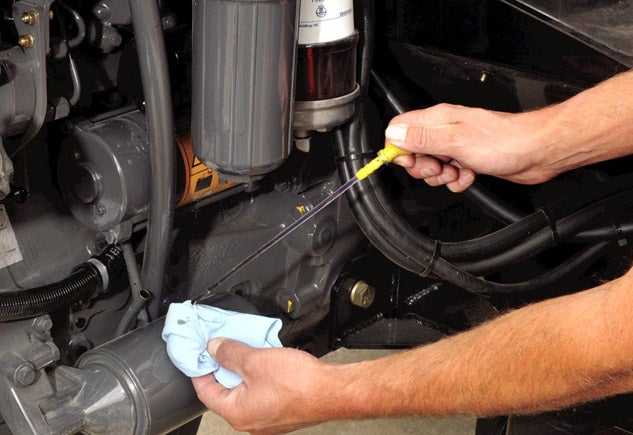
Newer tractors can go 500 hours and more between oil changes, but first check your owner’s manual for the recommended interval for your tractor. If usage is light, engine oil and filter should still be changed yearly. It’s cheap insurance against expensive repairs. To change the oil, warm up engine to encourage drainage, then let cool down to safe handling temperature. While draining oil, look for signs of water and other contaminants. The presence of metal filings is never a good thing. If present, a consult with your dealer should be in order to determine next steps. Consider an oil scan. It’s an inexpensive test that your dealer should be able to do or have done. Getting a baseline and then adding periodic scans can help finetune maintenance schedules.
Engine coolant service intervals are usually much longer than engine lubricants, but still should be inspected annually. Check coolant (when cool) with a hydrometer. Freeze scale indication should be below 34F and boiling point should be above 265F. If out of spec, flush and replace. Remember to replace the thermostat at the same time. And while the filler cap is off, inspect the filler neck area for debris, which if present, is another sign a flush and replacement is in order.
Hydraulic systems should be serviced according to the intervals provided by your manufacturer. Typically, this will be a 500-hour fluid and filter replacement timeframe with a filter replacement and fluid top off at 200 hours. The key to long hydraulic system life is to keep debris and moisture out. If you have access to a hydraulic pressure gauge ($50 – $150) with the proper coupler fittings for your tractor, you can test system pressure and performance of the pressure relief valve. The test is fairly simple; connect the gauge to the coupler of a warmed-up system using the black port (any port can be checked) and then pushing the joystick to the dump position (if using the black port). Gauge should read the correct system pressure and then cycle down to zero when the joystick is released. If less than correct system pressure is detected, consult with you dealer for hydraulic system troubleshooting. It’s also important to not hold down the joystick for more than a few seconds as the dead-headed circuit can overheat the hydraulic fluid.
Lastly, grease all service points. This means zerk fittings, linkage connections, and wear points. Use an appropriate grade of lubricant per the owner’s manual recommendation. This isn’t the time for a low-grade, cheap grease. Even a high-quality grease will only be a few pennies more per zerk than a cheap alternative, which most-likely will contain a lesser grade, lesser performing formula.
Finally, check the tractor tires for wear and abnormal (inconsistent) wear. Tire pressures should be to manufacturer specs; the exact range modified for your usage and compaction/slippage requirements. If the tires are fluid filled for increased ballast, a gauge specifically for filled tires is required. And before you head out to the north forty, check wheel lug torque with a good quality torque wrench. Wheel lug torque checking should be done frequently, say every 10 hours. Not convinced? Just ask anyone who’s lost a wheel in the field how frequently they now check lug torque.
Stick with the abovementioned checks, adding additional recommendations from your experience, your dealer, and the owner’s manual, and you can expect the fullest performance from your tractor, while extending life between major repairs. Remember, a tractor that isn’t working means you’re not either. Getting a jump on your springtime tractor maintenance will help ensure your tractor will be ready to work when you need it to work.
 Your Privacy Choices