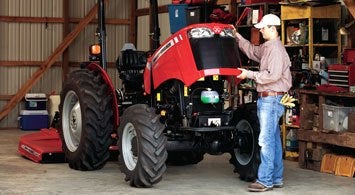
Last week we covered breaking in your new tractor, the oils used, and what kind of records you should keep; the importance of routinely checking the tightness of nuts and bolts, general lubrication, oil change frequency, air filter servicing and the servicing of a hydrostatic transmission.
This week we’ll cover servicing the mechanical front wheel drive (MFWD) axle, engine components such as fuses, battery and belts, the changing of engine coolant and fuel filter, servicing the mid-mount mower (MMM) and some general daily tips to help get the most out of your machine.
As we noted last week, the intent of this article is to cover general maintenance you can do yourself and is not intended to supersede manufacturer specific maintenance intervals found in your owner’s manual. When in doubt, check with your dealer.
MFWD
Axle oil level should be checked only after at least one hour of settling. Clean the area around the axle dipstick before checking the level. The oil level should be between the high and low markings. If level is low, add manufacturer recommended gear lubricant until the oil level is correct.
The axle level should be checked at least every 200 hours or by manufacturer recommended interval. Changes generally occur every 500 hours. When doing so, several pans are handy, though it is possible to change axle oil using one.
 |
First, position a pan underneath the differential and remove the drain plug. There will also be drain plugs on both outboard ends of the front axle and these too need to be opened and drained. When all axle oil has been drained, reinstall drain plugs and then remove the axle dipstick. Add the correct amount of recommended gear lubricant, then allow one hour before checking the level again. Add lubricant as necessary. We also recommend checking oil level after a few hours of use until level settles as desired.
FUSES
Fuses are a first line of defense in protecting your tractor’s electrical system. In normal use and conditions, fuses should not blow. If they do, it is an indication that something is wrong. You should know the location of your tractor’s fuse box (if equipped) and if not, the location of the inline fuses used.
Having spare fuses of the correct amperage rating on hand is always a good idea. If a fuse blows and your replace it with a second fuse of the correct amperage and that blows, it’s definitely time for diagnosis by a qualified service technician. Your tractor most likely will have fuses protecting the headlight/taillights, engine, glow plugs and starter, work lamps, and turn/warning lamps.
BATTERY
Much as in your automobile, tractor batteries require little servicing. Keep them clean and free from corrosion and long life can be expected. Since most tractor batteries are of an electrolyte type and contain sulfuric acid, eye protection and gloves should be worn. If the battery you are servicing isn’t sealed and there are caps that can be removed to check electrolyte level, the proper level should be halfway between the bottom of the filler neck and the top of the plates. If electrolyte level is low, use only distilled water to refill to the proper level.
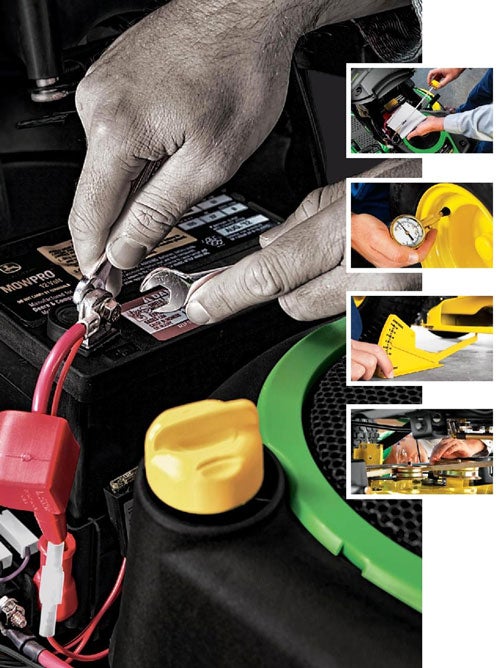 |
Battery terminals should be kept free from corrosion. We recommend disconnecting the battery cables before servicing by first disconnecting the negative (-) ground cable and then the positive (+). Terminals can be cleaned with a solution of four tablespoons of baking soda to one gallon of water. Be careful none of the wash solution goes into the cell area. Petroleum jelly or silicone spray can be helpful in keeping terminal corrosion from occurring. When reconnecting the battery, always connect the positive (+) terminal first, followed by the negative (-). In circumstances where long periods of inactivity take place, battery tenders can be especially helpful in extending battery life.
BELTS
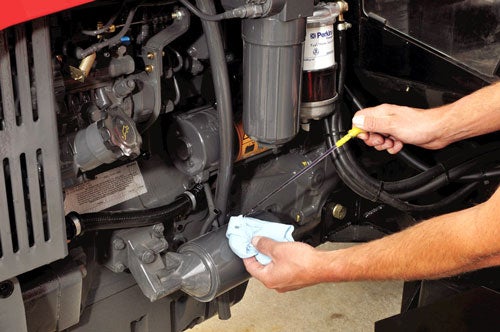
There is no designated service replacement interval for alternator belts, but don’t let that turn into a “let it fail and replace” interval. Check the alternator belt at each service, inspecting it for cracks and wear. Tension can be checked by applying your thumb to the belt which should deflect approximately 3/8”. If tension is loose, adjust by loosening the adjusting bolt and applying tension until the desired amount is reached. Don’t forget to retighten the adjusting bolt. A good safety tip while servicing anything engine is to first remove the negative battery terminal.
COOLANT
Most tractors of today are liquid-cooled. That means there is a water pump that moves coolant through a radiator and back into the engine. As on an automobile, a recovery tank is generally used, making the adding of coolant simple and safe. Translucent materials are used for the tanks with FULL and LOW levels indicators molded on, so a visual check of coolant level is easily accomplished. If coolant level falls below the LOW level indicator when cold, add manufacturer recommended coolant for your temperature zone until the proper amount is indicated. Coolant when warm should be between the FULL and LOW indicators.
Never open the radiator cap when hot. The coolant will also be hot (scalding) and built-up pressure can result in an explosive release. If the radiator cap must be removed, wait until the radiator and cap are cool enough to touch with your hand. Coolant life and anti-corrosive properties are long, generally not requiring replacement for two years or 2,000 hours. We like to check our coolant yearly between changes for freeze point and clarity. Freeze point can be checked using a Prestone (or equivalent) AF-1420 which we’ve seen retailing for as little as $6.45 or by test strips.
 |
Draining and replacing coolant is a fairly straightforward procedure requiring that you have a drainage pan, a few tools, a hose and flush handy, and replacement coolant meeting manufacturer recommended specifications. With a cool engine and radiator, slowly open the radiator cap to first stop to release pressure, then close cap tightly. Position pan under radiator and open the petcock. Coolant will drain into pan. When the radiator no longer drains, move pan under engine block drain plug and remove drain plug. When coolant drains from recovery tank, remove radiator cap, close radiator petcock and reinstall engine drain plug.
Now you are ready to flush out cooling system using clean water and a cooling system cleaner or quick flush. If you have any question as to what flush is recommended, see your dealer. Following directions on the flush can: fill the radiator with clean water and the flush until full, then install and tighten radiator cap. Start and run engine until it reaches operating temperature, then open radiator petcock and engine drain plug. It is important that this is done before rust and dirt settle. After flush is completed, close radiator petcock and reinstall the engine drain plug. Allow the radiator to cool and then fill it with fresh coolant. After running the engine to operating temperature, check recovery tank and add additional coolant as necessary.
While checking coolant freeze point and before changing coolant, it is also a good time to check the condition of radiator hoses and clamps.
FUEL FILTER
Before servicing your fuel filter and sediment bowl, you need to determine if your fuel system is self-bleeding or not. If it is not, we recommend you talk to your dealer before doing this service yourself.
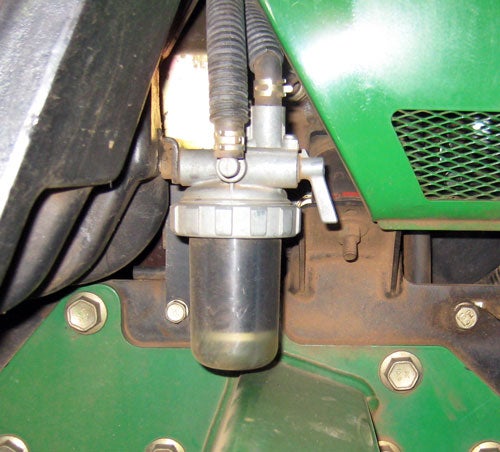 |
Sediment bowls can be visually checked, which should be done before each use of the tractor. If deposits are detected, a more frequent than recommended service interval may be required. To clean the sediment bowl and replace fuel filter, turn the fuel shut-off valve to the closed position and position a drain pan underneath to catch spillage. Always do fuel servicing in a well-ventilated area. Turn the sediment bowl locking collar counterclockwise (adjustable pliers can be used but be careful to not damage the collar or sediment bowl). After loosening the collar, remove and discard the filter. The bowl can be cleaned using a mild detergent and toothbrush. After drying completely, install new a filter and reinstall, locking down the collar hand tight. Open the fuel shut-off and crank the engine to bleed the fuel system.
MMM
The mid-mount mower is often one of the most used tractor implements and as such it’s important it receives maintenance at required intervals. At a minimum we recommend lubricating gauge wheels, mower blade spindles, driveshaft every 25 hours. While servicing the above, take the opportunity to check the mower blades for sharpness, nicks and dings. If you notice an uneven cut, check the deck for levelness. At 100 hours, or at a manufacturer recommended interval, check mower drive belts, gearbox oil level and look underneath the deck shields for built up debris, twigs, etc. Gear oil change should be in the vicinity of 500 hours.
At the end of the season, clean all grass buildup from under the mower and power wash, or better yet, steam clean the deck. A little care will go a long way towards a long service life.
TIPS
Along with the services covered this week and last, there are a couple of additional areas you should pay attention to. You’ve heard cleanliness is next to godliness, and in the case of your tractor’s cooling system, cleanliness is paramount to its proper functioning.
Check radiator screens and fins before and after each use and if the tractor is being used extensively in dusty/dirty conditions, hourly. Compressed air is effective in clearing buildup, but be careful to not damage any of the fins.
Storage of diesel fuel is also important: never use a galvanized steel container. Diesel fuel will react with the zinc based coating and create flakes that will plug filters and damage fuel injectors and pumps. For those that operate their tractors in cold weather, additives such as Power Service Diesel Fuel Supplement work well to preventing gelling and also boosting cetane (like octane in gasoline).
 |
And lastly, you’ve a lot invested in your machine, so take a little time to care for its visual appearance. You don’t have to go to the extent of some of our tractor friends where detailing with high quality waxes is a weekly event, but a nice cleaning and waxing every so often will go a long way towards keeping a near-showroom appearance.
 Your Privacy Choices